Skip to content


How to Fix a Loose Tile in the Bathroom

Loose tile repair can be a daunting task for the average home DIYer. But fear not, we have the perfect guide to answer the question – how to fix a loose tile in the bathroom! Loose bathroom tiles can be caused by several factors, such as damage to the grout lines or cracks in the tiles that lead to water leaking into the walls and floor space. Securing a loose tile in the bathroom is easier than it looks, trust us!
Step by Step Guide
Step One – Can I repair a Loose floor tile without Removing the Tile?
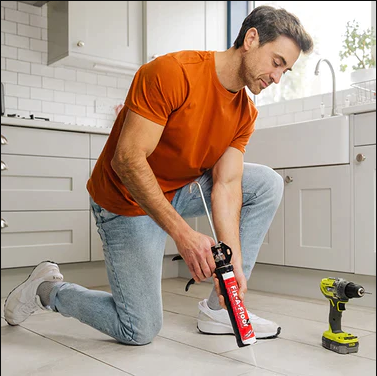
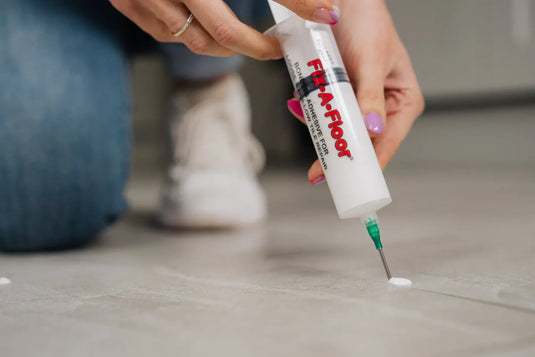
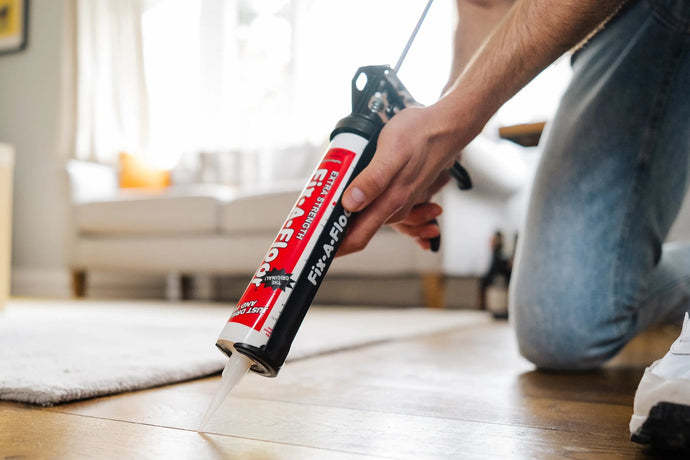
If your tile hasn’t completely come detached, and the damage isn’t noticeable, there’s a simple way to fix it without removing it. Simply drill the right-sized holes in the grout lines and use an appropriate adhesive, loaded in a caulk gun, and inject the adhesive into the holes. Once filled, wipe away any excess adhesive and allow to set for at least 24 hours. Regrout the grout lines with the appropriate coloured grout.
If you have a spare tile available, removing the tile is an alternative route to go down. To reduce the chance of damaging other surrounding tiles, break the affected loose tile into small pieces and remove it. We recommend using a grout rake to remove the grout around the tile but take care to not cut through any membrane behind the tile.
Then, grab a masonry bit and drill a hole through the middle of the tile, or several holes for larger tiles. This will make breaking the tile into smaller pieces easier but, like the grout lines, remember to take care not to drill too deep to damage the substrate or membrane. Next, by using a chisel and hammer, carefully break the tile into small pieces.
Step Two – Check for Damages and Leaks
The next step in securing a loose tile in the bathroom involves preparing the waterproof membrane and checking for any potential damage. It’s important to assess if there are any leaks underneath the tile you’re fixing and replacing as failing to resolve this could lead to future issues. The membranes will most likely be made from vinyl or rubber and ensuring these are in good condition before replacing the tile is important.
Step Three – Apply the Adhesive
For the tile to permanently bond, you’ll need the best adhesive for shower tiles, and we recommend a thinset tile adhesive or ceramic tile adhesive. A thinset tile adhesive is an easily spreadable adhesive that is water resistant, meaning it works fantastically in bathrooms. These are readily available throughout most well-known hardware stores.
Use a notched trowel to apply the adhesive and spread it evenly across the area you’re fixing.
Step Four – Secure Your Replacement Tile
Grab your replacement tile and push it into the adhesive with firmness, ensuring it is secure in the material. Holding it in place for about a minute is a good amount of time to make sure it is secure while you perform the next step.
Step Five – Regrout Your Tile
This step is all about applying grout to the tile which prevents water from getting behind it, enabling it to stay in place. Before applying the grout, make sure the adhesive or thinset has completely dried.
There are two types of grout you could use for loose tile repair, including un-sanded grout, perfect for tiles that are 1/8 inch (1.25mm) or less apart, or sanded, suitable for tiles that are more than 1/8 inch apart.
Once you have selected the type of grout most suitable for your tiles, mix it with water and blend until it turns into a paste. Apply the grout to the edges of the tile and going beyond the edges will help make sure all corners of the tile are covered. Excess grout can be removed using a sponge, or non-abrasive cloth, and some water. You’ll want to remove all excess grout carefully before it dries, as once set, it is very difficult to remove.
Step Six – The Finishing Touches
This final step won’t apply to everyone, but if you’ve replaced a tile surrounding joints that don’t lend themselves to grout, like those around shower fixtures and metal trims, use a waterproof sealant loaded in a caulk gun and seal those areas to prevent water leaking under the treated areas..
And you’re done! These are the best steps in fixing a loose bathroom tile. We’ve also got some great tips to consider before you begin securing a loose tile in the bathroom, so you know all areas are covered.
Extra Tips
Choose your replacement tiles before you begin any type of repair. Choose tiles with matching colours and sizes. If you can repair without removing or replacing this generally is the best option.
- Assess if you have to remove the tile before drilling any holes. If the tile is without cracks and is simply loose, a tile repair kit containing all the materials you’ll need to fix it without removal is the ideal choice.
- Consult and follow the manufacturer’s instructions on all materials you purchase.
Warnings and Things to Avoid
- Always avoid drilling too far into the tile as you’ll damage the membrane.
- When using a loose tile adhesive loaded into a caulk gun, when enough adhesive has been used to fill the loose space, it will leak out of the alternative holes in the grout lines. Be conscious of this and be prepared to wipe any excess adhesive with a non-abrasive cloth.
- Take your time when breaking the tile into small pieces, as it is very easy to damage surrounding tiles that are not loose.
- Wear protection equipment such as safety glasses, gloves and even a mask for any dust particles and fumes.
Equipment You’ll Need
- adhesive
- Replacement tiles
- Tile adhesive/Thinset
- Hand tools
- Grout
- Sponge/non-abrasive cloth
- PPE